Small directional audio demo in Unity, perhaps for a sound based game.


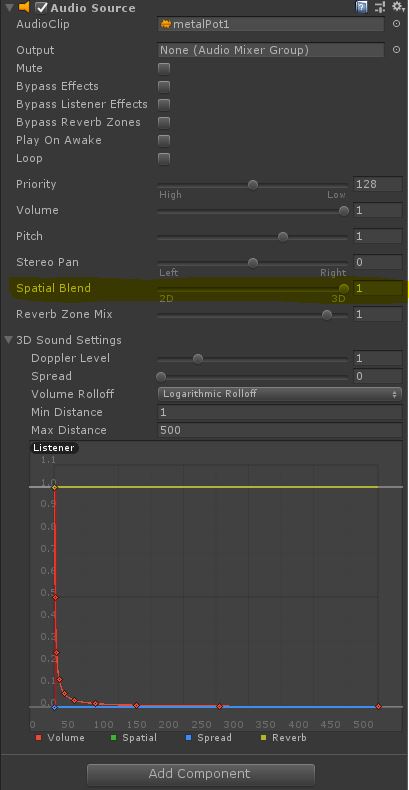
Note that to make an audio source 3D in Unity, you need to drag the “Spatial Blend” slider up to 1/3D. Default is 0/2D.
Small directional audio demo in Unity, perhaps for a sound based game.
Note that to make an audio source 3D in Unity, you need to drag the “Spatial Blend” slider up to 1/3D. Default is 0/2D.
Cheap and cheerful attempt at focusing on objects when looked at using Unity.
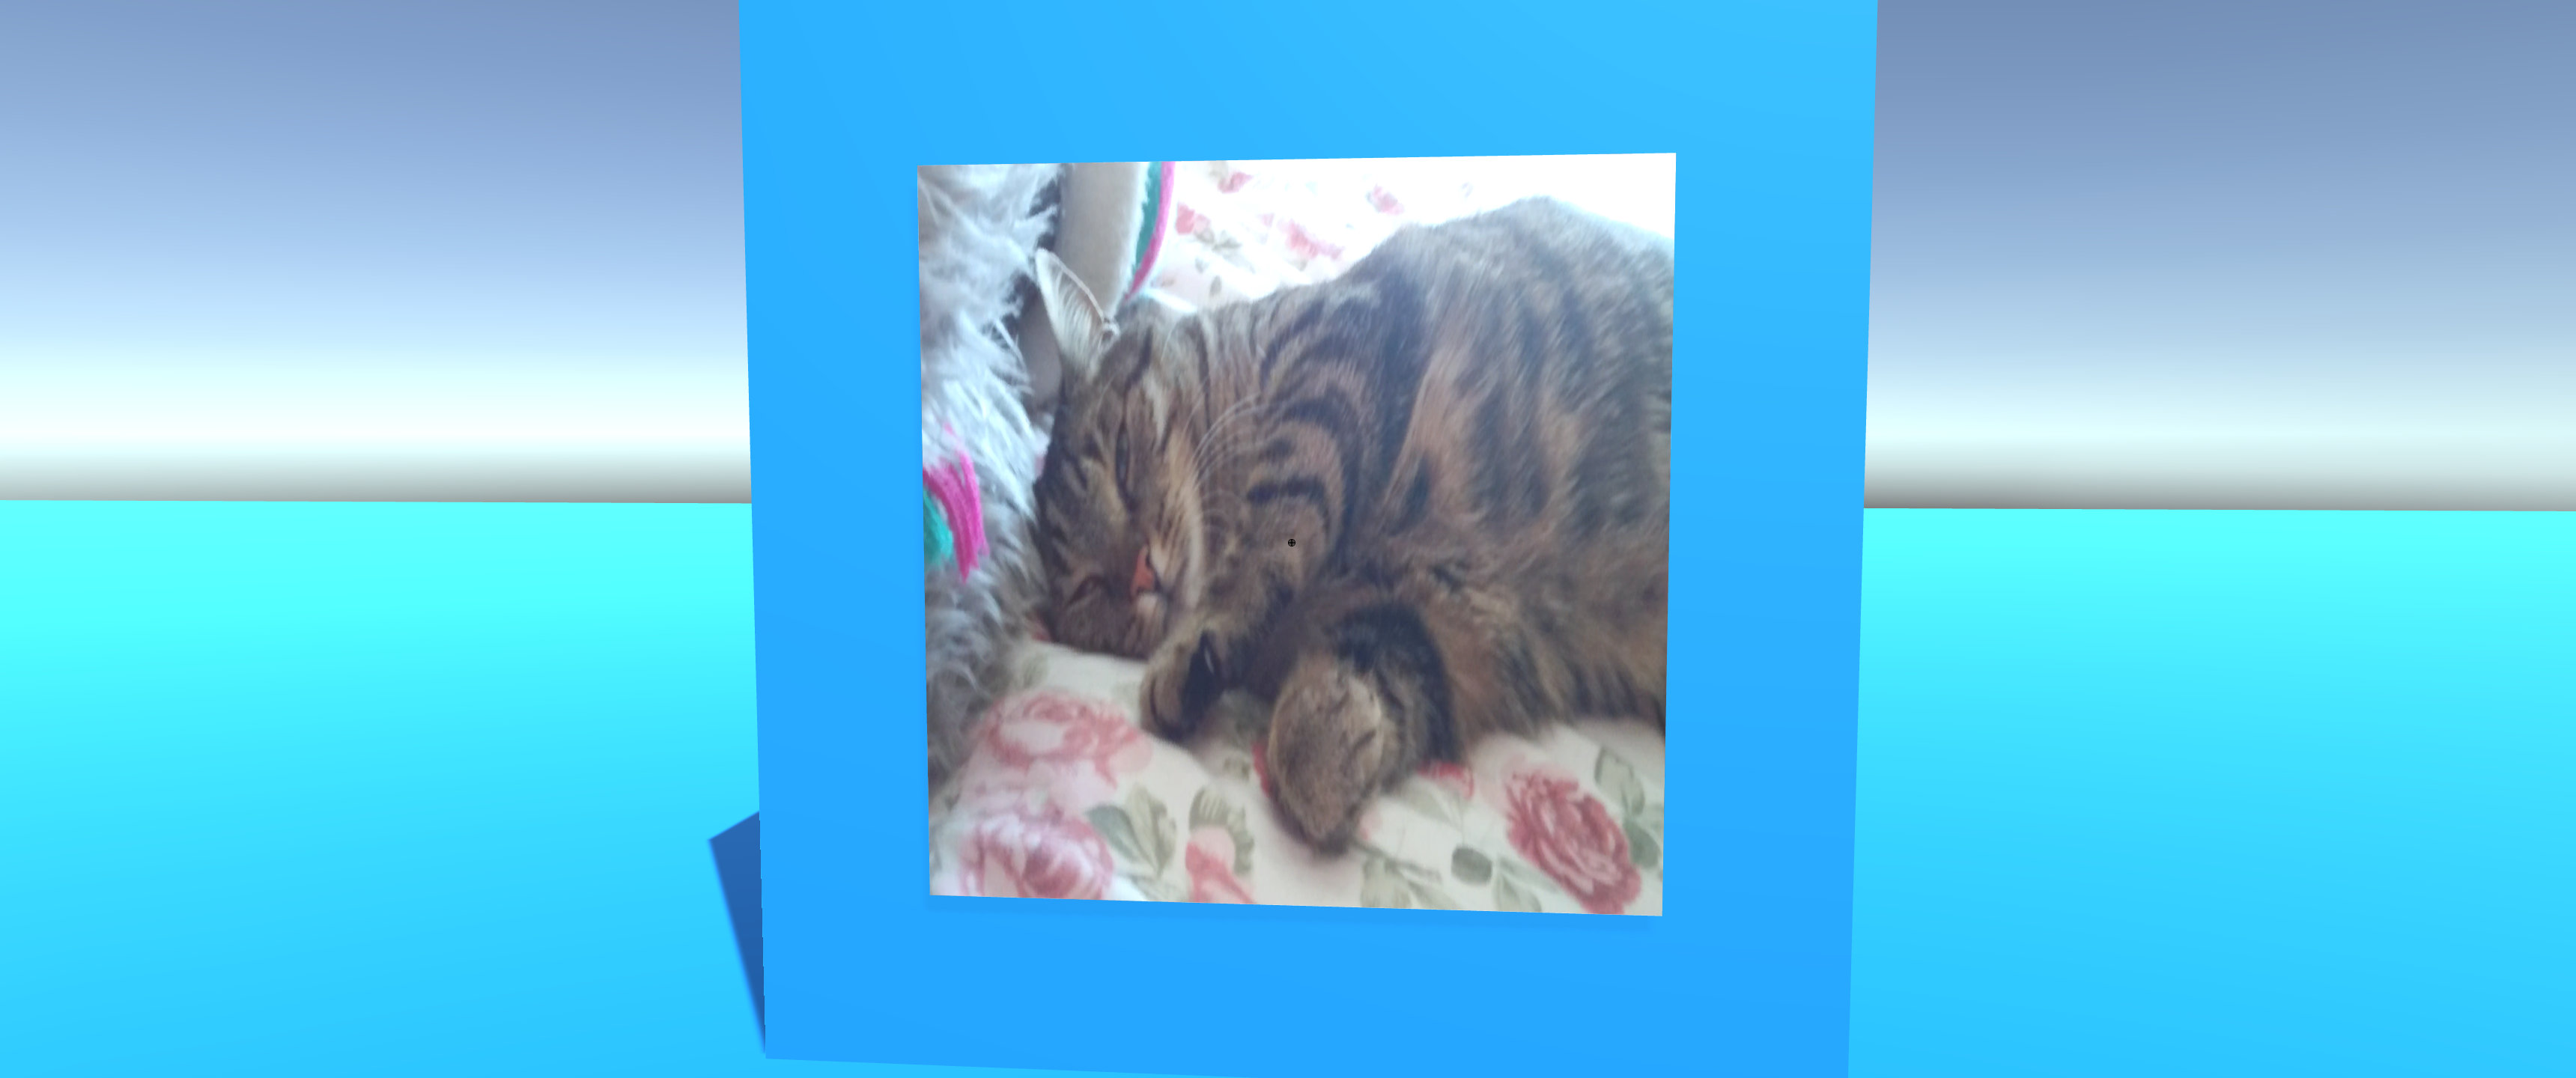
It could be improved by slowly zooming in and out rather than happening instantly. If you wanted the TV to act as a computer it would probably be better to release the player from the look and zoom state by the movement keys instead of amount of mouse movement.
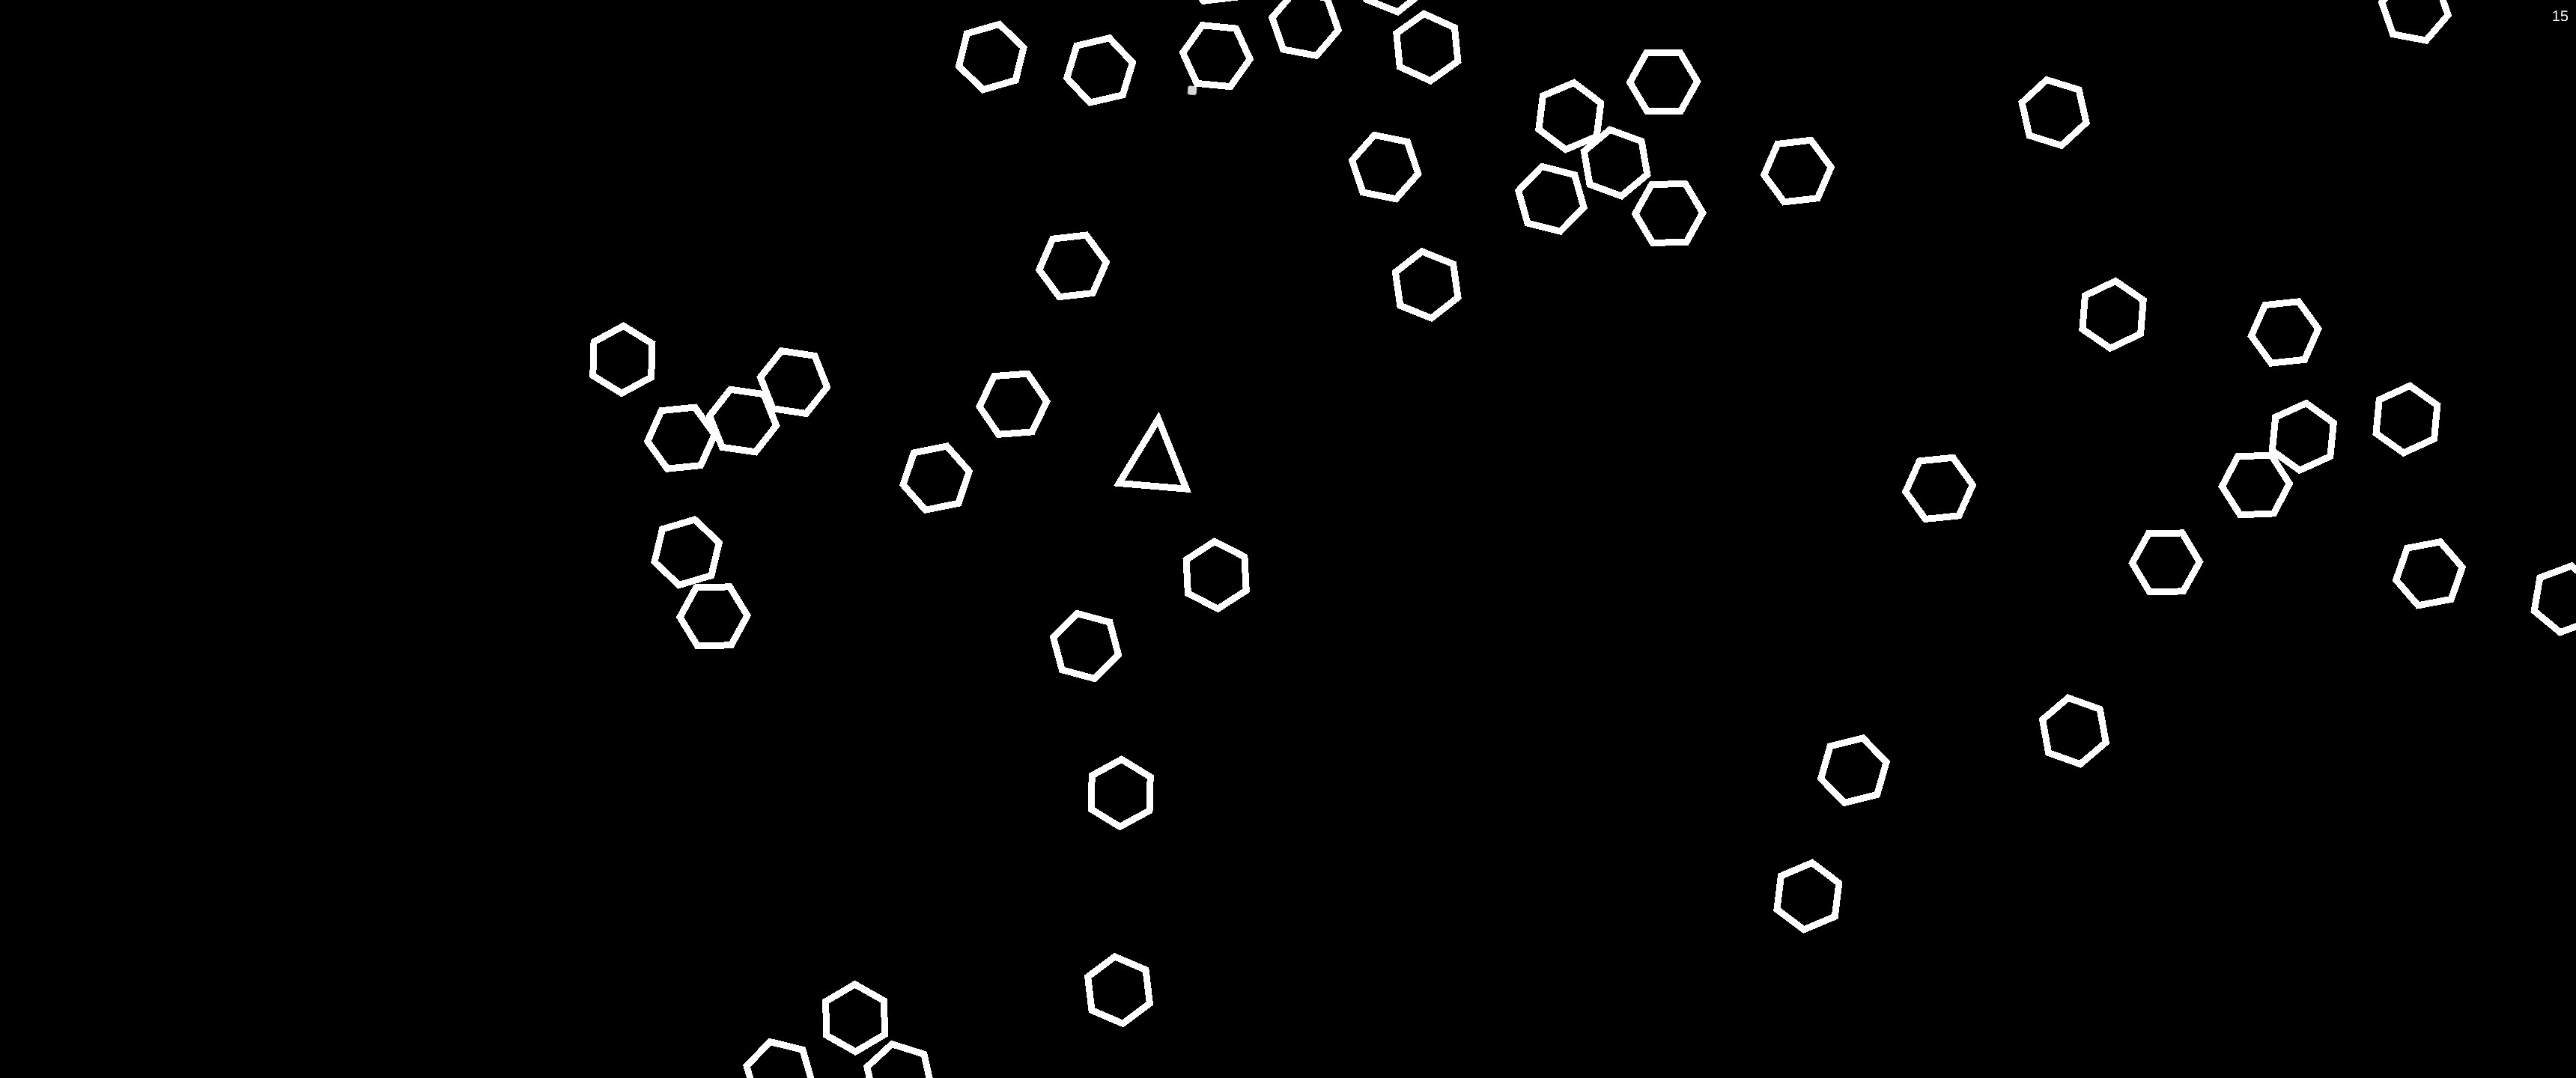
A quickly put together Unity game similar to Asteroids. Survive as long as you can without colliding with an asteroid. Arrows or WASD to move and space to fire. Survival time score in the top-right.
I’ve submitted updates to my Guernsey Flights and Guernsey Sailings Android Apps to the Play Store. Other than being a massive update to work with newer phones, the only notable change is that the app will only check for updates on a watched flight or sailing every 15 minutes now. This is due to battery saving measures in later versions of Android preventing me from consistently checking for updates. I’m planning to deploy both apps on Saturday the 13th of October.
You can get it sooner by opting to enter the open beta. There’s a section about joining the beta on the apps store pages and you just click “Join now” to do so. Let me know if you have any problems.

Monitor Guernsey Airports arrivals and departures.

Monitor Guernsey Harbours arrivals and departures.
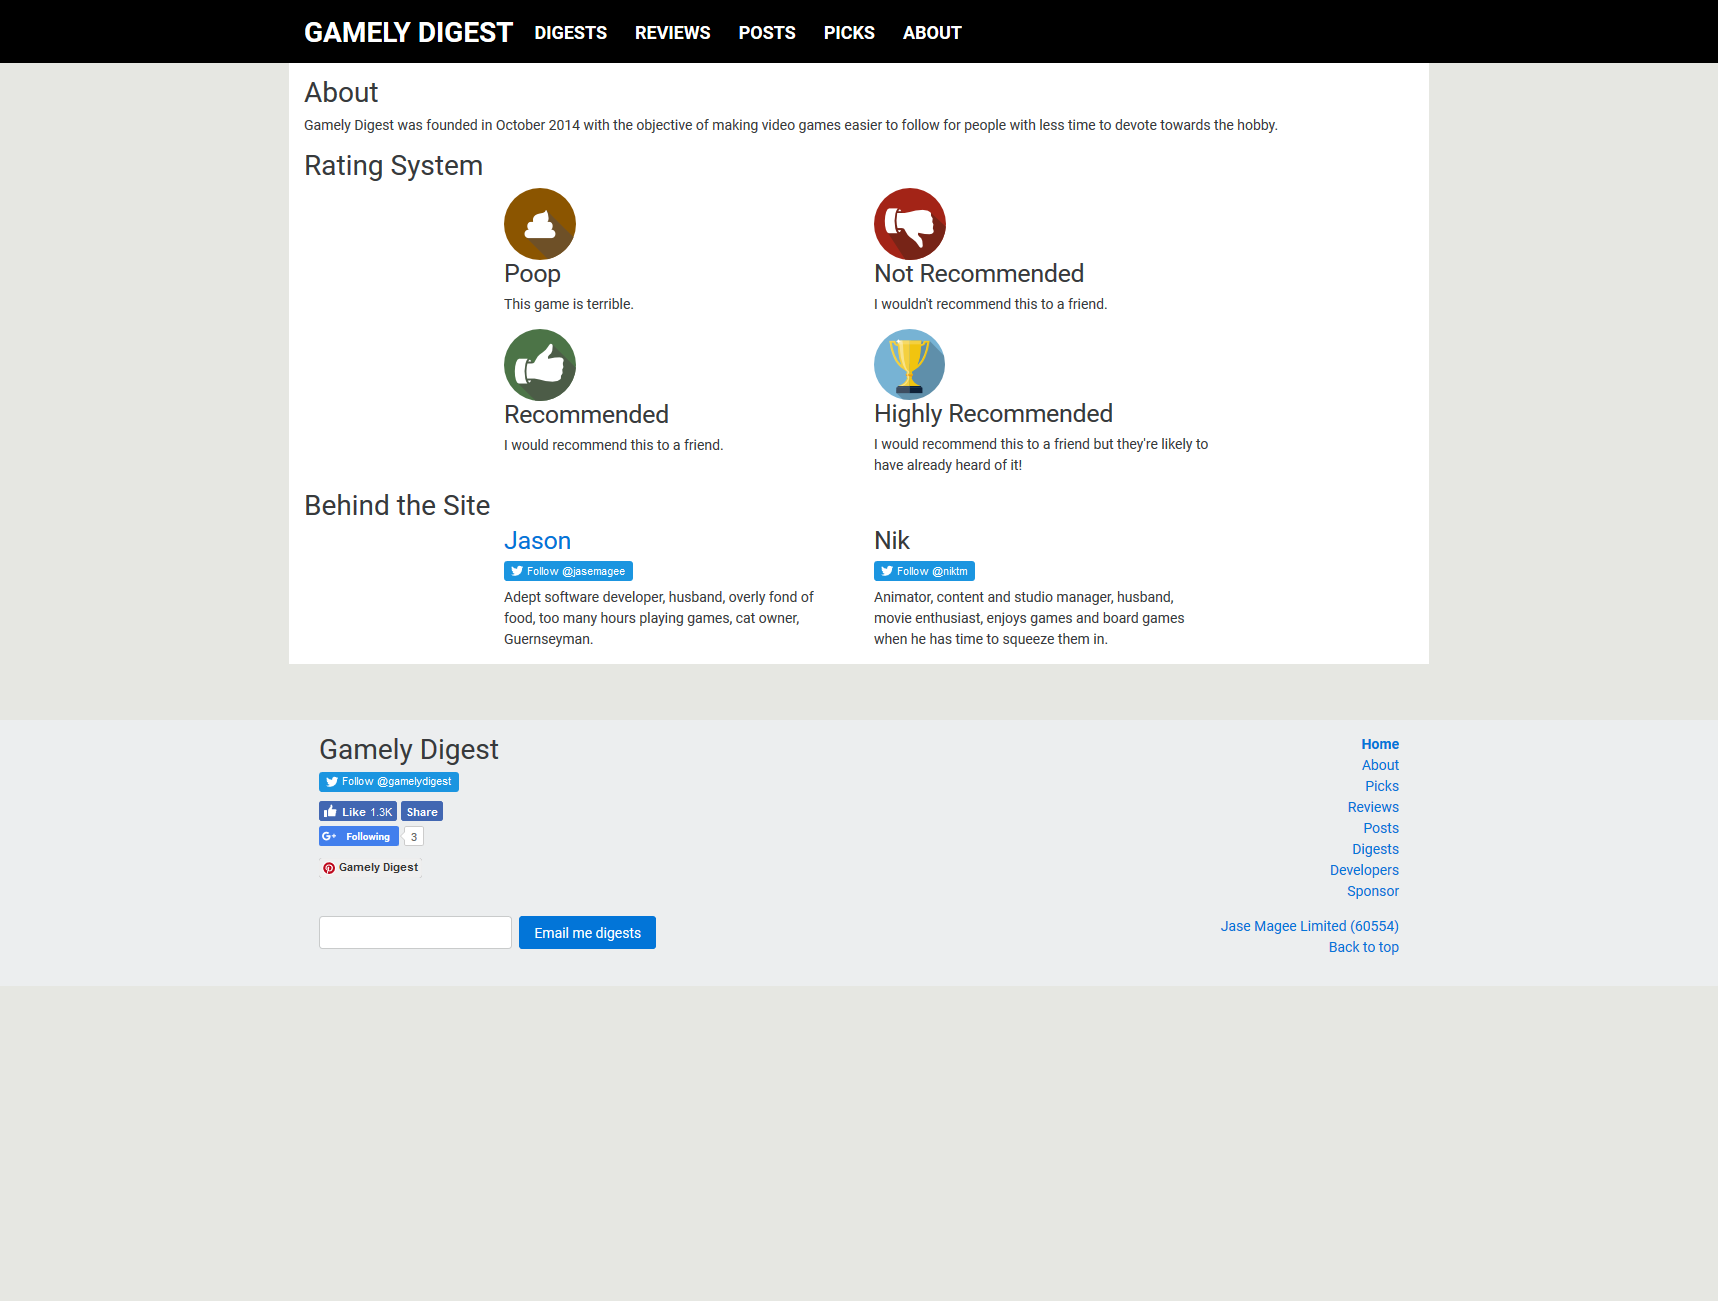
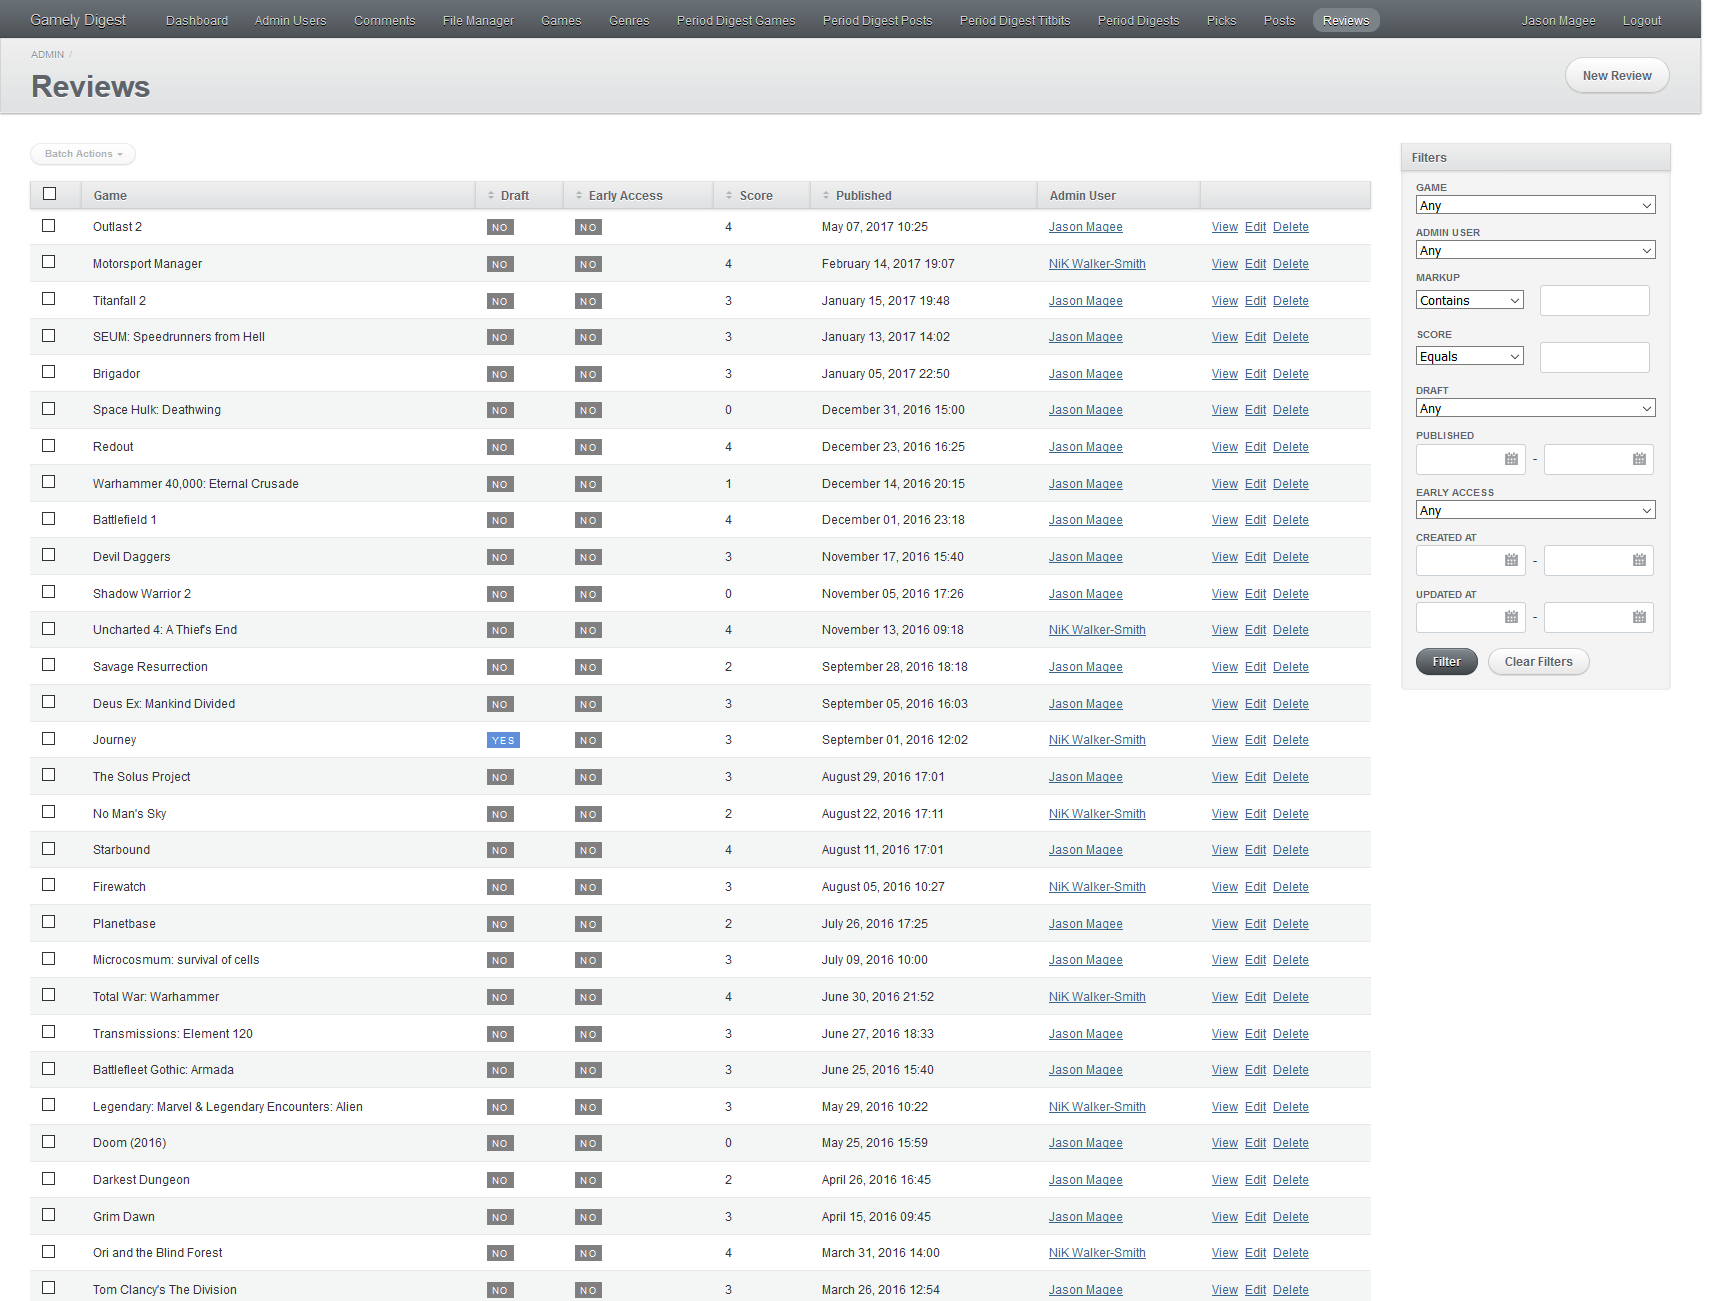
Nik and I have decided it is time to call Gamely Digest a day. We ran the game review site from October 2014 to December 2017. Our objective was to make it easier to follow video games for people with less time to devote to the hobby. We made the reviews shorter and even tried making a couple of short YouTube videos . Ultimately, it took a great deal of time to to keep the website up-to-date and as such now have great respect for people running such active websites. Although we amassed a good following on Facebook and had reasonable click through on adverts, it was never quite clear how the website could become sustainable without plastering adverts all over it.
A big thank you to Nik for joining me on this venture!
On the technical side, the website was built by me using Ruby on Rails. Nik and I could login, create, draft and publish posts and reviews as well as upload files. Check the last two screenshots below to see the Admin Panel which was created using Active Admin . The site also automatically integrated Disqus for posts and reviews.
For portfolio purposes, I’ve attached some screenshots below. The YouTube videos will always be available.


This is a short post to demonstrate a simple way to pass an array of data to a stored procedure. I’ve supplied some C# to use it too.
Firstly, create a custom table type in SQL. Note that you only need to do this step once per database.
CREATE TYPE [dbo].[IdList] AS TABLE(
    [Id] [int] NULL
)
Update your stored procedure to accept a parameter of the new type.
@Ids AS dbo.IdList READONLYIn C# build the table like this.
var idTable = new DataTable();
idTable.Columns.Add("Id");
foreach (var id in ids) {
    idTable.Rows.Add(id);
}
Add it as a command parameter like so…
var tableParam = cmd.Parameters.AddWithValue("@Ids", ids);
tableParam.TypeName = "dbo.IdList";
tableParam.SqlDbType = SqlDbType.Structured;
Finally, use the array in your stored procedure like this.
(a.OtherId IN (SELECT Id FROM @Ids)Outside of working on games for Granite Games , I spend a great deal of time experimenting and learning in Unity. Normally, I’ll figure out something I was interested in learning and leave the project forgotten on my NAS in case I ever need it. By the time I need something from these projects I’ve long since forgotten how they work so I’m planning to document them going forward. Hopefully, they’ll end up being useful to other people too. This is going to be my first tutorial, based off of a live session I did back in 2016 at the Digital Greenhouse Guernsey intended to show to make a simple game in 10 minutes.
Now, just to note, this tutorial is intended for people who know some programming.
1. First, let’s create a default 3D project. Just give it a name.

Before going any further, we need to understand what Scenes, Game Objects and Components are in Unity.
Eventually, the main Unity view will pop up. It’ll look something like this.
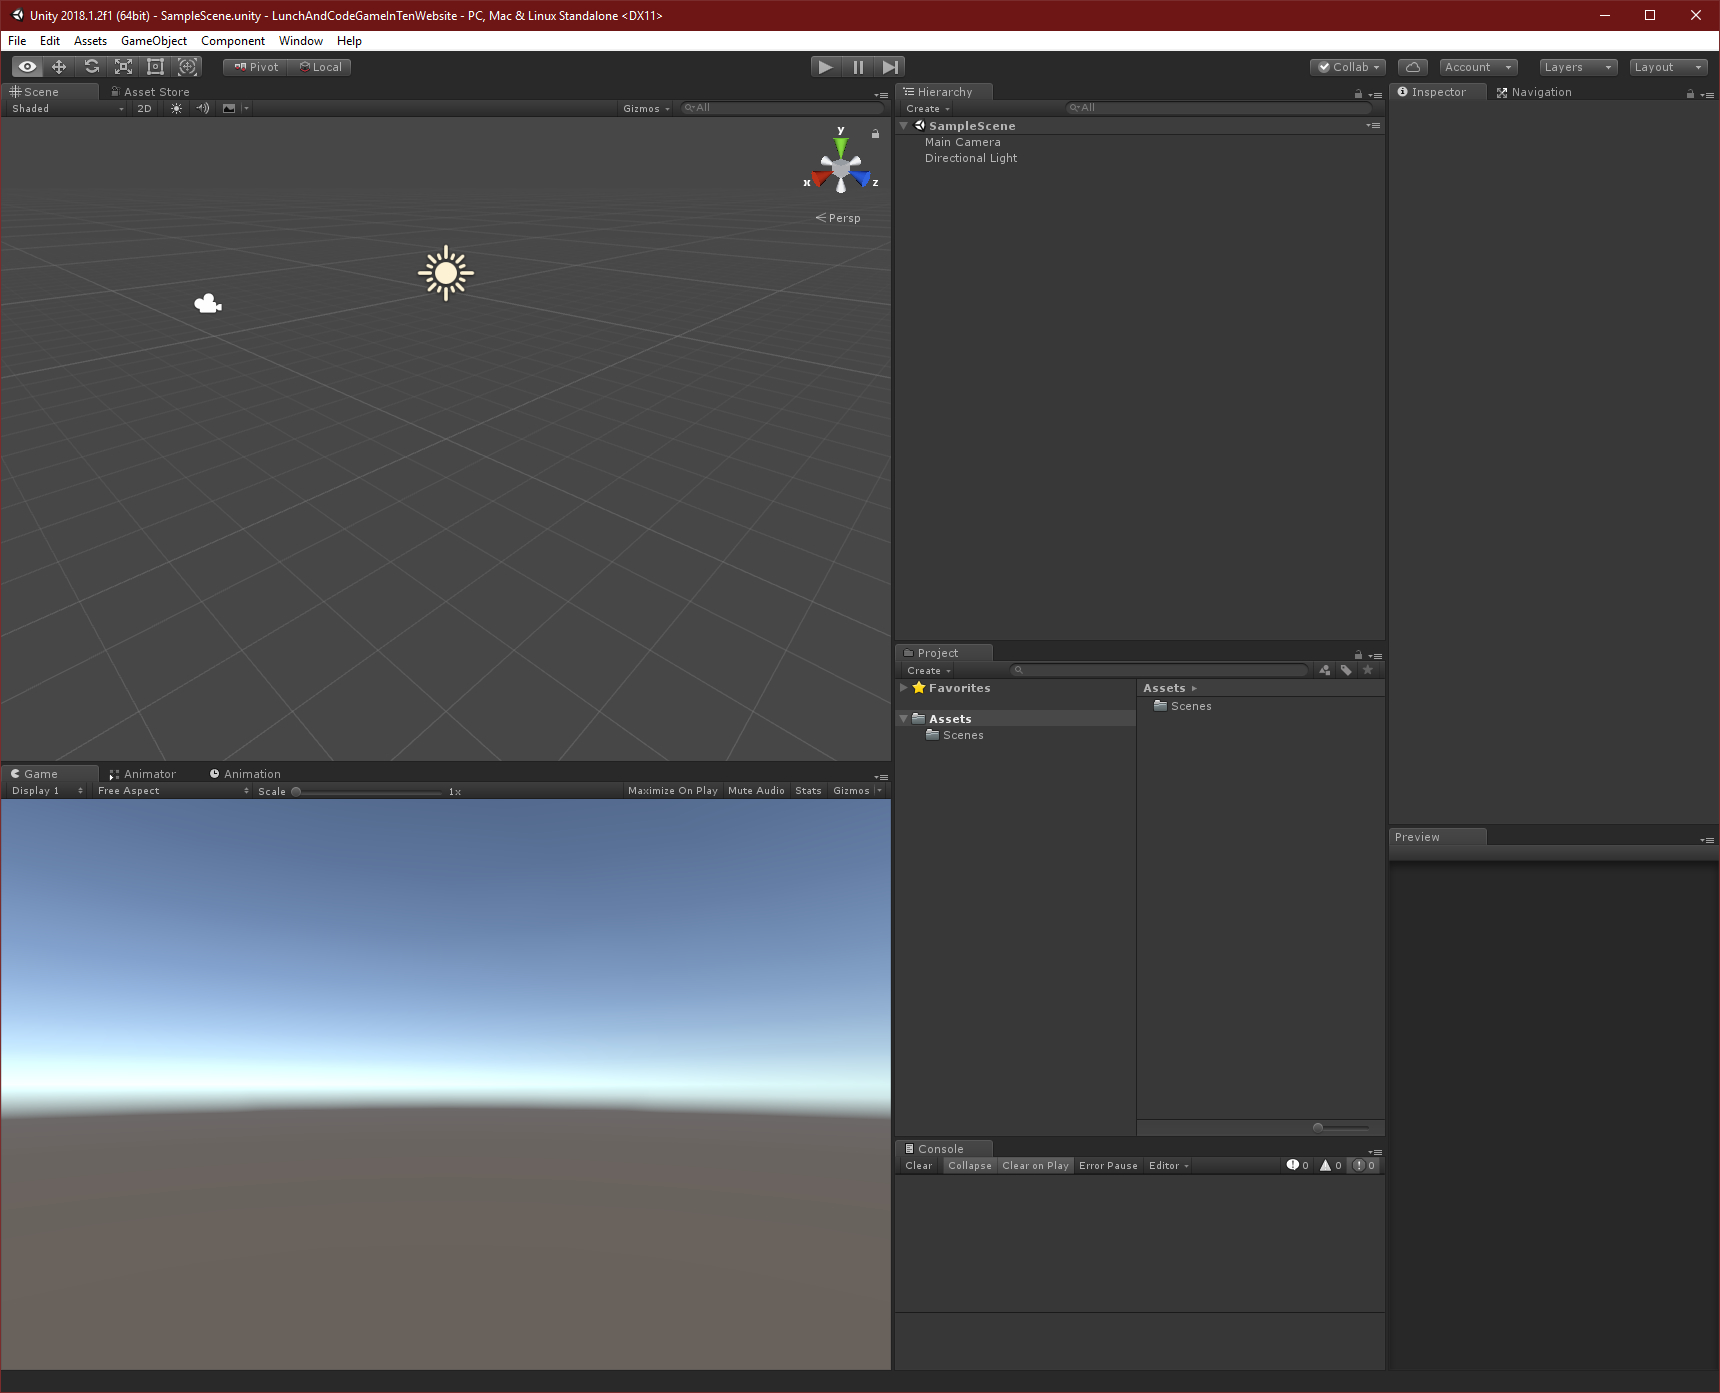
There’s a couple of different views here, you can find out what they’re called by looking at the tab title in the top left above the view. Here’s what they’re for…
Debug.Log("This will appear in the console");2. We need a solid base for the play area, we’re going to use a plane for this. Right-click in the hierarchy view and select “3D Object->Plane”, a plane will appear in the scene and game views.
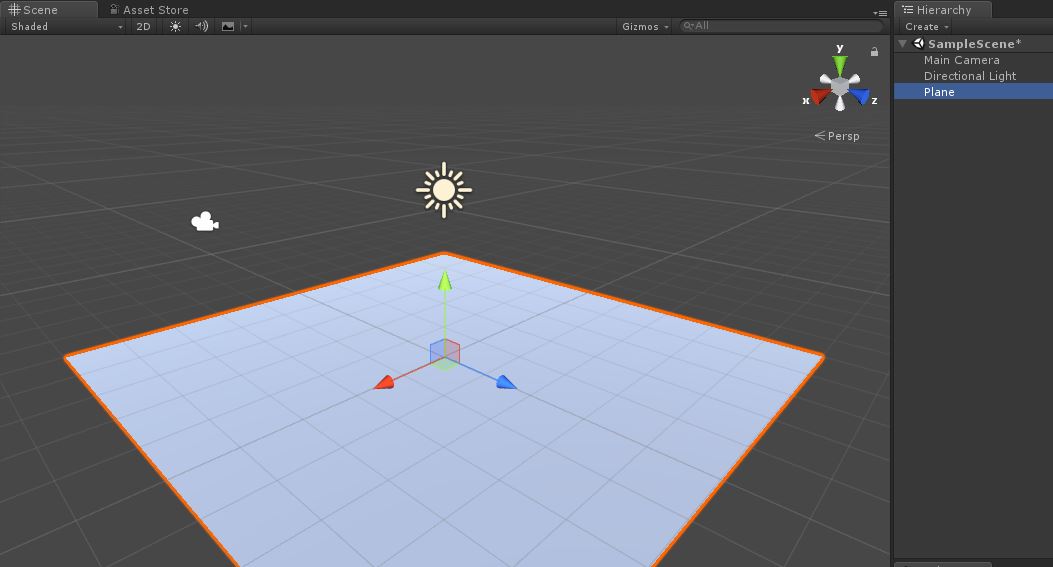
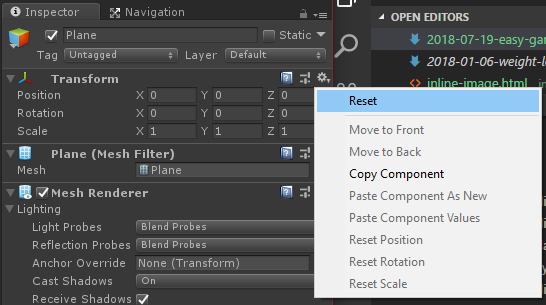
3. For unknown reasons, Unity tends to create new game objects at slightly random positions. Whenever you make a new game object you’re going to want to reset it back to 0,0,0 position by clicking the little cog next to the “Transform Component” in the inspector view and clicking Reset. Note this area also controls position, rotation and scale. Remember that for later!
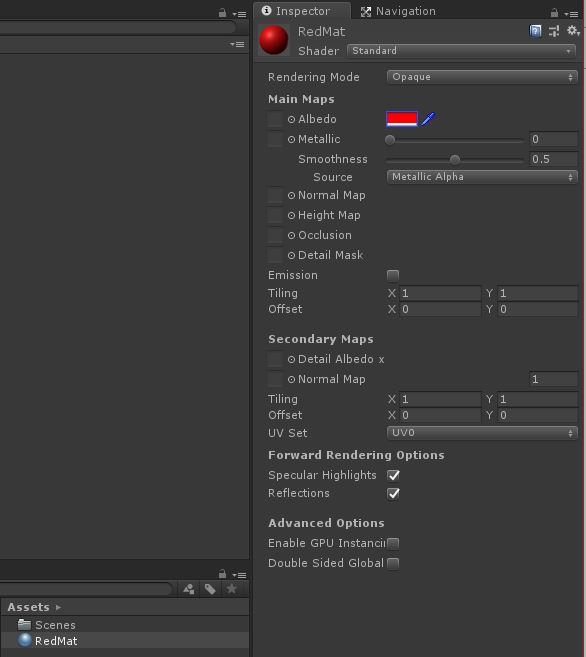
4. New 3D objects in Unity all have the same material (called “Default-Material” - look in the inspector view with the plane selected to find it) which has a grey colour. We can change this by creating our own material with a different colour. Right-click in the project area click on “Create->Material”. Name the new material “RedMat”, if you lose focus of the renaming box, you can use F2 to re-enter rename mode. Make sure the material is selected and in the inspector view, change the Albedo colour by clicking the white rectangle. Pick a red colour using the colour tool that pops up.
5. In the project view, drag the RedMat onto the plane in the scene view to set it as the material. You can also select the plane and in the inspector view, drop down the Materials (under Mesh Renderer) to pick a different material using the circular icon to the right of the 0th element.
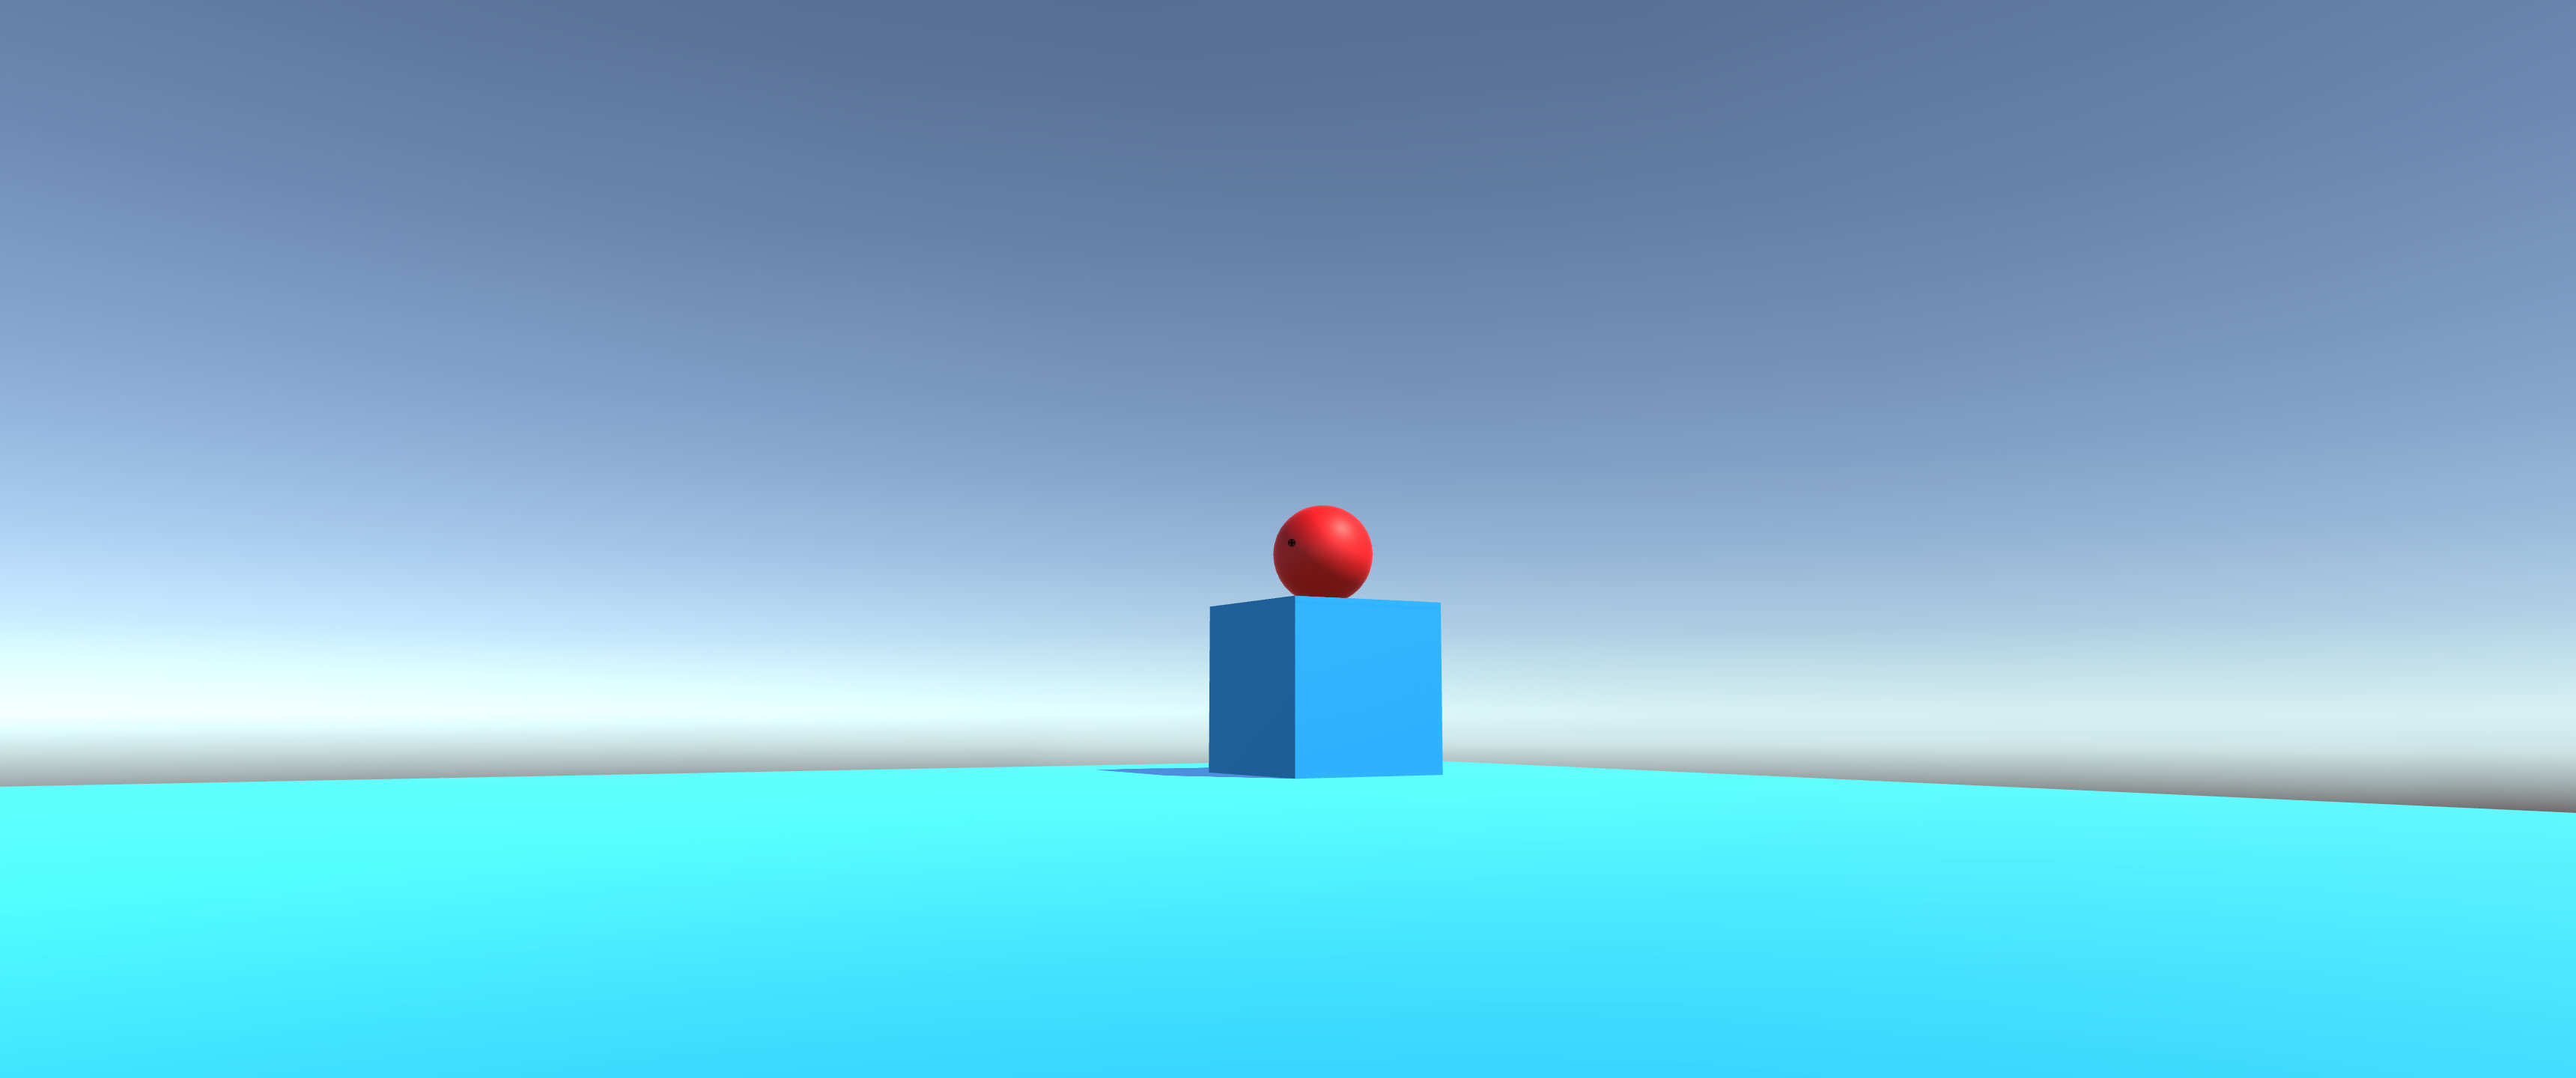
6. In a similar fashion to the plane, create a sphere with its own material. I’ve given mine a pink material.
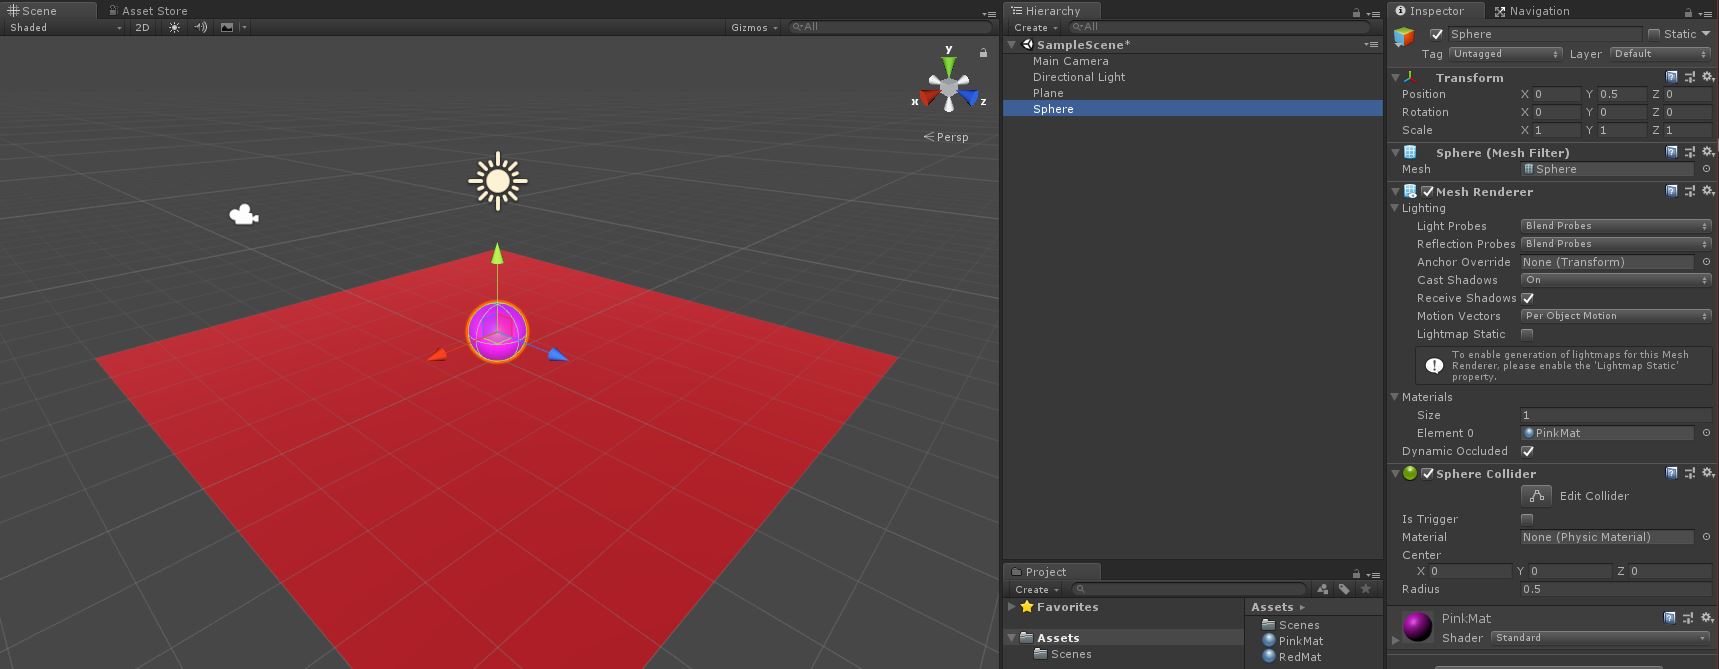
7. Raise the sphere to be positioned slightly above the plane. I set mine to be 0, 0.5, 0. You can move it using the arrow or by manually inputting in the transform component position field. Use the left mouse button and the green arrow as shown below to move it manually.
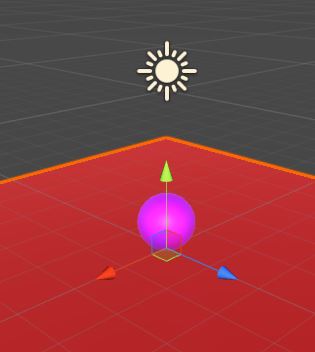
If you can’t see these arrows make sure you’re in the right mode by selecting this button at the top left of Unity.

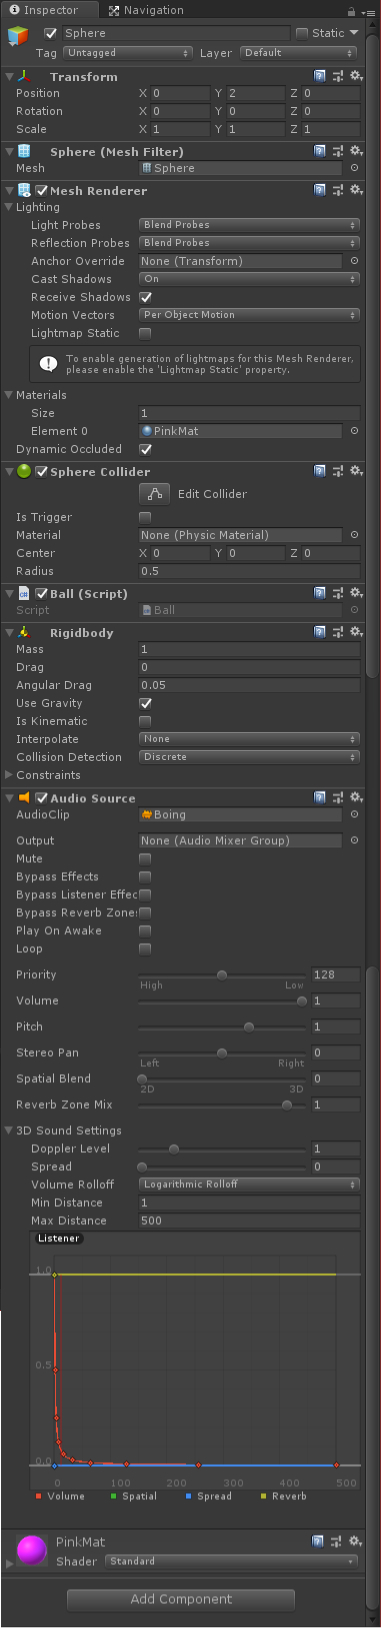
8. Select the sphere and click “Add Component” in the inspector view. Start typing Rigidbody and two options will appear. We want the standard Rigidbody as we’re not making a 2D game, so click it or press Enter on the keyboard. A Rigidbody tells Unity that this game object will be under the control of Unity’s physics engine. You can read more about them here .
9. Do the same thing again but this time we want to add an AudioSource allowing us to play a boing noise when the ball jumps. You can either add your own boing noise to your project or download mine here . Drag it into your project view to add it. After it’s in your project view, drag it into the Inspector AudioSource AudioClip field. Also, disable “Play on Awake”, you only want it to play when we tell it to. You’ll notice the AudioSource has tons of options, don’t worry about them for now. You can read more about the Audio Source here .
10. Let’s do some code now. Right-click in the Project area and do “Create->C# Script”. Call it Ball. To add the new script to the sphere you can either…
Your sphere should look something like this.
11. Double click the Ball script in the hierarchy or inspector views to open it. Another application will open allowing you to edit the script. Replace the code with the following.
using UnityEngine;

public class Ball : MonoBehaviour {
    /* How much to move by */
    private const float moveAmount = 0.1f;
    /* How much to jump by */
    private readonly float jumpAmount = 8f;
    /* The Rigidbody we added to the Game Object in the Unity UI */
    private Rigidbody rigidbody;
    /* The AudioSource we added to the Game Object in the Unity UI */
    private AudioSource audioSource;

    /* Use this for initialization */
    private void Start() {
        /* Use this to get another Component from the Game Object.
        In this case we want the Rigidbody and the AudioSource */
        rigidbody = GetComponent<Rigidbody>();
        audioSource = GetComponent<AudioSource>();
    }

    /* Update is called once per frame */
    private void Update() {
        /* This is a kind of hacky way to ensure we can't do anything unless
         we're on the ground. The ground is at Y 0 so if  we're > than .6f
         we're probably jumping */
        if (rigidbody.position.y > .6f)
            return;

        /* Jump */
        if (Input.GetKeyDown(KeyCode.UpArrow)) {
            /* Cancel out any other forces on the ball,
             otherwise it's really easy to jump off of the
             platform */
            rigidbody.velocity = Vector3.zero;
            /* Add some force for jumping */
            rigidbody.AddForce(new Vector3(0, jumpAmount, 0), ForceMode.VelocityChange);
            /* Play our Boing noise */
            audioSource.Play();
            /* No further actions allowed, exit */
            return;
        }

        /* Vector3 describe a XYZ position.
        Zero is just a constant 0,0,0 */
        var movement = Vector3.zero;

        /* Left */
        if (Input.GetKey(KeyCode.LeftArrow)) {
            movement += new Vector3(moveAmount, 0, 0);
        }

        /* Right */
        if (Input.GetKey(KeyCode.RightArrow)) {
            movement -= new Vector3(moveAmount, 0, 0);
        }

        /* Add some force to the ball,
        so we're using physics to move it */
        rigidbody.AddForce(movement, ForceMode.VelocityChange);
    }
}
The code isn’t too complicated and I’ve commented it as best I can to help. If the ball is roughly on the ground, see if the up key is pressed and if so, do a jump and exit, otherwise grab the LeftArrow and RightArrow inputs and move the ball. Notice the class inherits from MonoBehaviour that’s standard for a Unity script. Start() and Update() are both called automatically. You can read more here .
Try it. The ball should jump, move left and move right now. There should be a sound when you jump and you shouldn’t be able to control the ball until it lands on the ground. The game view is probably pointing in a strange direction, so let’s point it at a sensible place. There’s a game object called “Main Camera” in the scene, select it and change these transform properties to be:
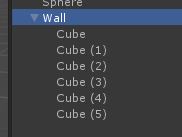
12. Moving on to the wall, this time create an empty game object (“Create Empty” in the right-click menu). Name the empty game object “Wall”. Set its position to 0, 0, -4. Add a Rigidbody to the wall and check “Is Kinematic” and un-check “Use Gravity”, we’re telling Unity we’ll control this object by making it kinematic. As the wall needs to have a block missing for the player to move through, we’ll make the wall out of 6 blocks.
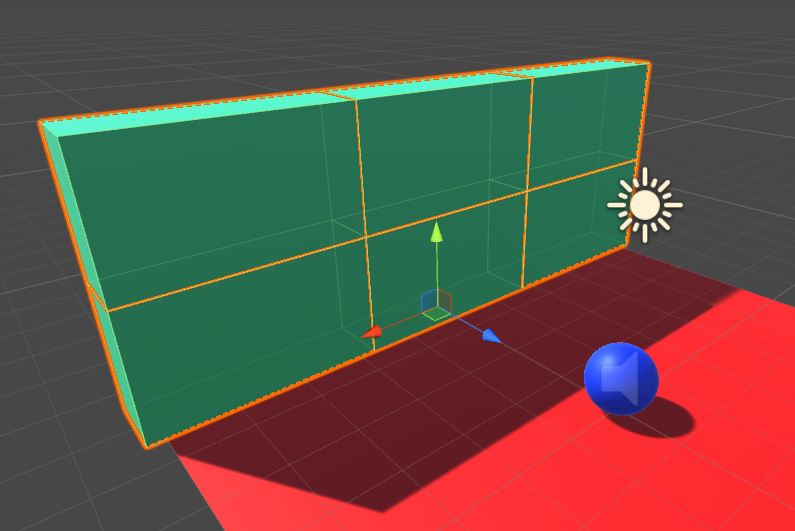
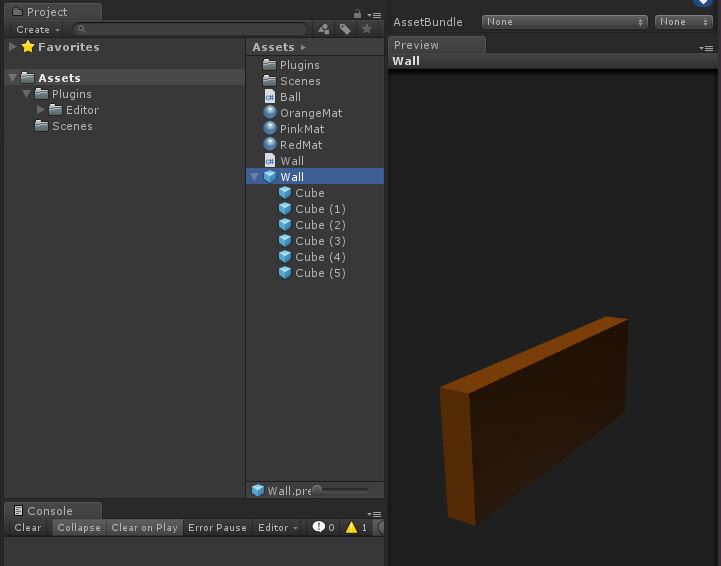
Each block is going to be a game object inside the parent wall game object. This means we’re going to right-click on the wall game object and add a “3D Object->Cube” 6 times, adding them to the wall game object means they’re children. My cubes are scaled to 3.5, 2, 1. You should be able to figure out the positions yourself, but they’re…
Now, as before, create a material and assign it to all of the cubes. You’ll end up with something like this…
13. Create a Wall script and add it to the parent wall game object. We want the Wall script to create a hole in itself by deleting one of its children for the player to try and pass through and we want it to move towards the player after a short delay.
using UnityEngine;

public class Wall : MonoBehaviour {
    private readonly float speed = 3f;
    private bool begunAttack;

    /* Use this for initialization */
    private void Start() {
        DeleteRandomChild();
        /* Invoke is a Unity method, it will
         call the "BeginAttack" method after 2 seconds */
        Invoke("BeginAttack", 2f);
    }

    /* Update is called once per frame */
    private void Update() {
        if (begunAttack) {
            /* We don't need any fancy physics for this
             so just move the Game Object along. Use
             Time.deltaTime so we keep the movement consistent
             as Update() will be called more often on a fast PC
             than a slow one */
            transform.Translate(0, 0, speed * Time.deltaTime);
        }
    }

    /* Once this is called after 2 seconds,
     begunAttack will be true and so Update()
     will start moving the wall */
    private void BeginAttack() {
        begunAttack = true;
    }

    /* Destroy a random child Game Object from
     this Game Object */
    private void DeleteRandomChild() {
        var randomChildIndex = Random.Range(0, transform.childCount);
        Destroy(transform.GetChild(randomChildIndex).gameObject);
    }
}
Pressing play now, it should work as intended. A block of the wall will disappear and after 2 seconds it will move towards the ball, knocking the ball off if it’s in the way. The next problem is that this only happens once, we want it to repeat this process until the player dies.
14. To make the wall game object re-usable, we’ll need to make it into a prefab. A prefab is similar to a class in programming, it’s something you make instances of. To make an existing game object into a prefab, drag it from the hierarchy view into the Project view. Check it out in the project view now, it should look pretty similar to how it did in the hierarchy.
15. Once you’re sure the wall prefab is in the project view, delete the Wall game object from the scene.
16. We’ll need to make another empty game object now and attach a script named WallSpawner. This game object is going to be responsible for creating walls on a timer for the player to avoid. Set the position of the wallspawner to be 0, 0, -4 so the walls spawn at that position.
17. Use this code for the script.
public class WallSpawner : MonoBehaviour
{
    public GameObject wallPrefab;

    void Start () {
        InvokeRepeating("SpawnWall", 1f, 3f);
    }

    private void SpawnWall() {
        Instantiate(wallPrefab, transform.position, Quaternion.identity);
    }
}
You’ll notice WallPrefab is a public property and doesn’t get set inside this code. We’re going to set this inside Unity to be the wall prefab we just created. Go back to the inspector and you’ll see a slot for a wall prefab.
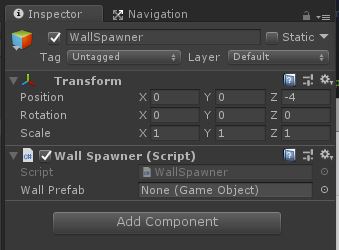
Drag and drop the wall prefab from the project view into this slot. It’ll look like this.

18. Your game is done! Obviously it’s not complete, it needs a menu, a win condition, lose conditions, scores, etc. but hopefully you’ve learnt enough to get you started.
Thanks to Steve Streeting for proof reading.
Just a short post to show off my new Ducky Shine 6 Mechanical Keyboard.
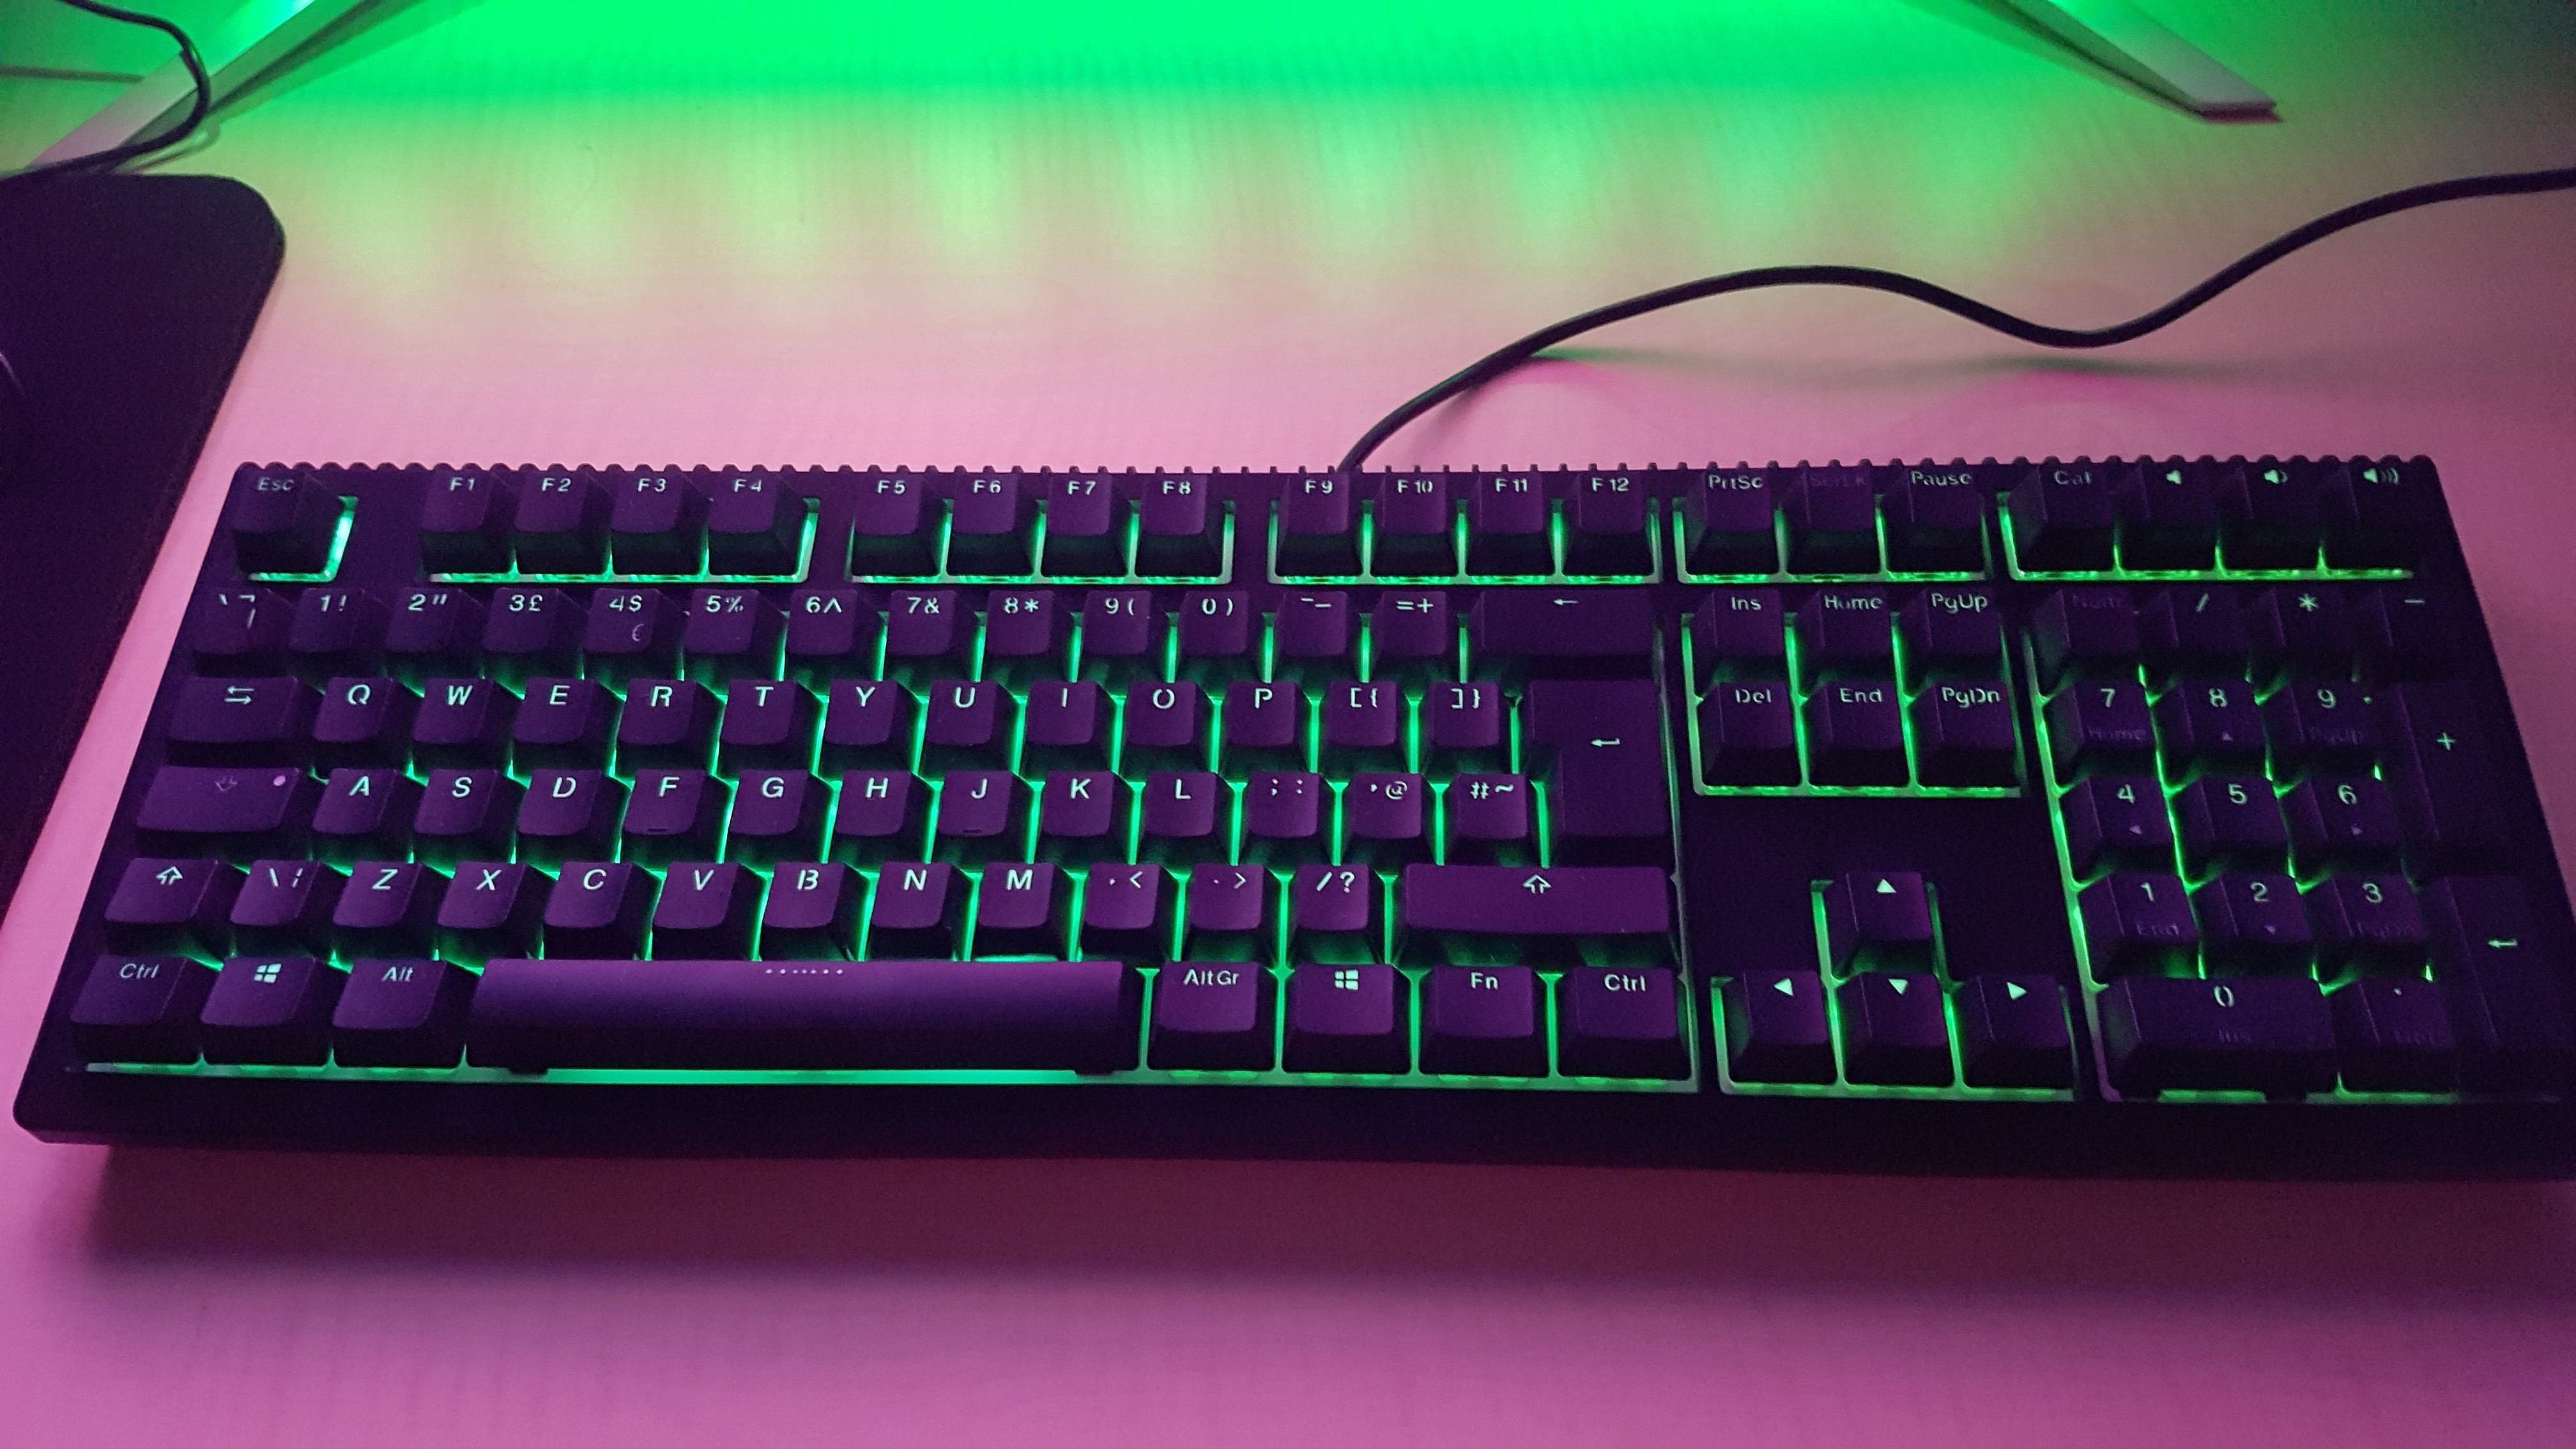
This is more of a refresh than an upgrade, my previous keyboard was a Das Model S Professional UK Silent which has the same Cherry MX Brown switches that the Ducky Shine 6 does. I’ve moved the Das into one of my regular clients as there’s nothing wrong with it. It’s from 2012 so before Das’s standards supposedly started to slip. The obvious addition to the Ducky is the RGB lighting that can be heavily customised. I wasn’t sure I would like the lighting but I’ve set it to slowly change colours which is subtle and not irritating.
Here’s a short video of some of the lighting effects:
During 2017 I have lost…

I’ve dieted before with mixed success but nothing close to the scale of weight lost this time round. Initially, the diet started with my wife when we decided to be healthier and she started cooking all of our meals from these Joe Wicks books…

I also stopped snacking, eating junk food and drinking fizzy drinks. From then I purchased a weeks worth of containers and started prepping meals or using left overs to take for lunch. I’ve always commuted by walking or cycling about 8km a day - but it’s probably worth noting that I was already physically active. By the end of February I’d lost 10kg.
In March I decided to give jogging a go, something I’ve done before but disliked, except this time I kept with it. I started by jog-walking my commute until eventually I was able to jog both ways. I lost another 10kg by July.
Weight loss bets with my friends also contributed. For a few months we had monetary bets on who could lose the most weight in certain periods.
At this point I started snacking again and eating more normally, however my weight continued to go down to 75kg in September. From then I’ve been able to eat pretty much anything, while continuing to jog and doing the fasting trick mentioned below (if my weight increases by much).
Throughout the diet I logged my weight daily (in the morning) which proved to be a great way to keep on top of your progress and to find out what is or isn’t working. Here’s some interesting findings…
Additionally, I only ever ate dinner before 6pm and would only eat an apple or drink mint tea from then. I had a cheat meal once a week, usually Chinese, which would be after 6pm. Mixing fasting and jogging in the morning is an insanely good way to trim fat; in the morning only drink black coffee or green tea until midday.

I’ve been able to do 5 half-marathons in 2017 and plan to do a full one in 2018.
This year we ( Granite Games Limited ) are site managers alongside Ben Wratten (from the Digital Greenhouse ) of Guernsey’s Global Games Jam. The Digital Greenhouse are kindly hosting the event as they have done for the previous few years. There’s currently 11 of us and you can sign up for the Guernsey Global Games Jam 2018 here !
The event is not just limited to creating video games, people can also make board games and electronic games. You don’t need to be an expert either and people will be around to help when they can.
Granite Games started after the second Guernsey Global Games Jam and I would highly recommend going to meet people and from a learning perspective.
A lot of people turn up near the end of the events, particularly with children, to play the games we’ve created and watch the presentations at the end. If you’re not coming to the event, feel free to pop in near the end.